-40%
Tissue Culture Starter Kit 108 Microclone Tubes Most Plants Include Cannabis
$ 184.77
- Description
- Size Guide
Description
Microclone Tissue Culture 108 Tube Starter KitFor Introduction into Tissue Culture,
Selection of Disease-free Plants and Viroid outgrowth strategy
Genetic Lift and Frequent Superior Plant Selection
Transportation of Clones.
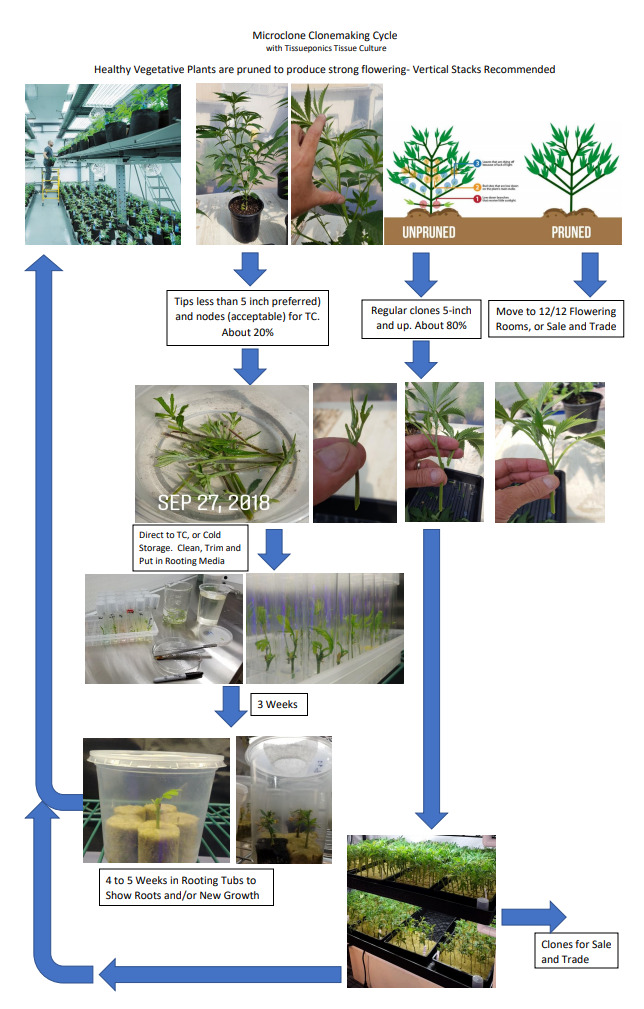
Welcome to the newest technology for introducing cuttings into tissue culture. Our most current version uses liquid tissue culture media to provide faster, easier, and simpler plant introduction using trash clippings from veg plants heading into flowering.
The Microclone Tissue Culture Liquid Starter Kit contains prepared Microclone liquid media, tools, and instructions to put your first plants into tissue culture cloning. With only a few items from around the house you will soon be creating your future microclones.
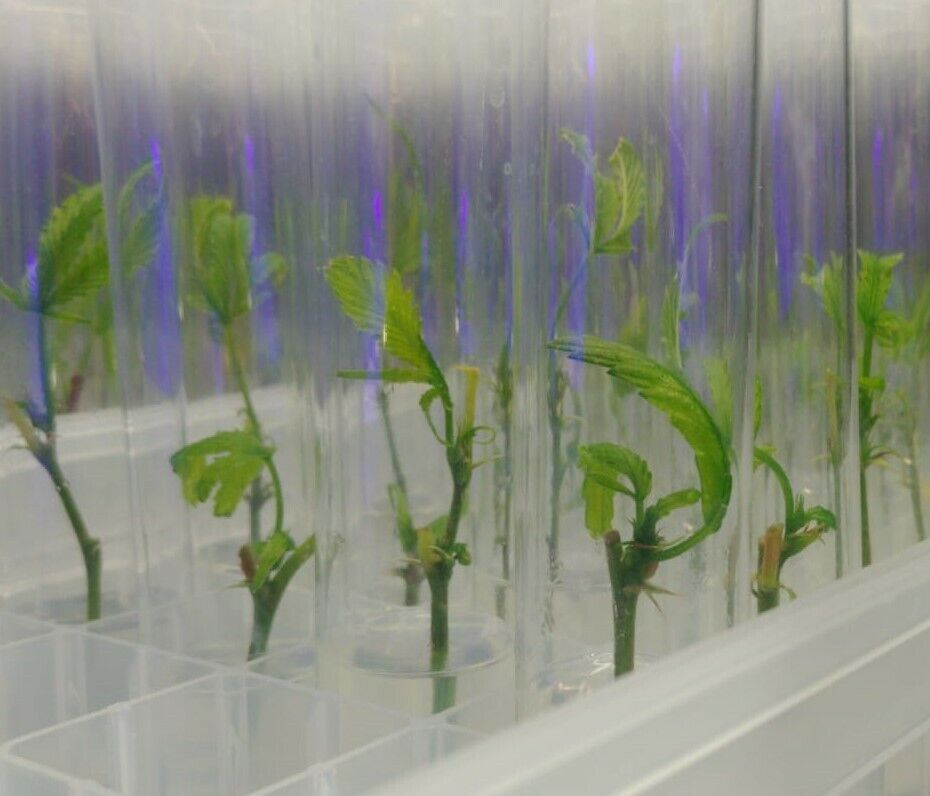
The secret to plant tissue culture is using sugar as an energy source, instead of bright light. The tiny cuttings absorb sugar, nutrients, and hormones directly through their surface. The plants grow in the self-contained environment while hormones in the media encourage branching and new plant production. The vessels keep the plants small, saving time, light, and money. Preservatives have been added to the medium to reduce the possibility of mold. The new branches and nodes are the foundation of the Microclone grow room and sources of thousands of cuttings.
The Starter Kit contains:
Microclone liquid media in sterilized bottle-
Root formula for Tissueponics and direct to rooting learning.
Tubes in rack
Scalpel and forceps
Plastic washing jar
Chlorine sanitizing tablets
Sealing tape
Sterile paper towels
Home items: Plastic storage container to use as a work hood
Smooth plate for cutting
Rubbing alcohol 70% or 90% in spray bottle
Clean scissors or snips to trim cuttings
Five inch far to hold instruments in alcohol
Small trash can
Grow light such as compact fluorescent or LED-6W/sf
Because we are using sugar, sterile technique prevents organisms like fungus and bacteria from taking advantage of the food source and growing into contamination. Preservatives have been added to the medium to reduce the possibility of mold. Sterile technique begins with the setup of a clean handling and plant growing room with smooth cleanable surfaces and HEPA air filtration, pressure cooker or microwave preparation of the growing media and vessels, alcohol sprays and dips for a hands and instruments that will touch plants, and chlorine surface decontamination of plants going into culture. The following techniques may be viewed on YouTube under “Microclone Liquid Introduction”.
Start by setting up the clean area and hood where you will cut and handle plants. The hood protects the plants and tubes from mold spores that may be floating in the air. Set the storage container on its side in a clean, draft-free location. The kitchen and bathroom are good locations. Plan to light and grow the plants in the same area because reducing contamination is key.
Wash the tub in the sink or shower, dry, and wipe down with alcohol and set it on its side. Spray the tools with alcohol and stand up in 4” jar. Fill jar to neck with 70%% or 90% alcohol. Place in hood at the right side if you are right-handed. Clean and wipe the plate with alcohol and put it in the center of the hood.
There are only two tasks to put plants into the prepared gel, cleaning the cuttings and putting them in the tubes. Trimming the plant cuttings eliminates extra foliage and removes parts exposed to mold spores at the same time they are made into small cleanable pieces. The washed pieces are then trimmed to remove the bleached ends and placed in the tubes to grow.
Prepare plant cuttings: Select clean, healthy vegetative branch tips. Trim into 2 inch pieces and trim away leaves, leaving 3/8” of leaf stem above the node. Cut ends will be trimmed once more after bleaching to remove bleached cut tissue. Leave one inch or more below lowest node to be trimmed so that node will be located where the media surface meets the air. This node is often the most aggressive as it is in contact with both the sugar medium and the oxygen to metabolize the sugar.
Washing Jar Part 1: Put the pieces into the washing jar. Run some tap water into the jar and shake gently to wash off any loose material and drain. Fill and add a drop of simple detergent and stir to dissolve oils and begin killing mold and bacteria.
Drain the soapy water and rinse until no longer sudsy and drain again. Add the Dichlor and water to wash jar and soak for one hour, swirling every 10 minutes. Some bleach will get on your hands, cleaning them at the same time. The objective is to clean the plants and the vessel before going to the clean hood.
Trimming and planting: Make sure tools and plate are freshly cleaned with alcohol and take one tip out of the jar with forceps. Hold forceps as far back as you can and try to work with your hands as low as possible without reaching over the plate. You will often pass tools to your left hand across the front of the plate. Shake off residual alcohol drops before grabbing plant. Try not to remove tools from hood and keep them at least 3 or 4 inches inside of hood. It is OK if the tools pass over the plate, just not hands that may drop skin flakes. Gloves are OK if you have them.
With the node cutting in the center of the plate, pass the forceps to your left hand and take the scalpel in your right hand, holding as far back on the tool as you can. Trim away the bleached ends, about 1/16”. Do not damage the bud inside the node. That is the growing point that will develop into your new plant. Point the upper end of the node to the right side of the plate, put the scalpel back in the alcohol, and pass the forceps back to your right hand.
Loosen the lid of one of the tubes so you are able to lift the lid and hold the tube with the same hand with the lid protecting the tube opening. This is a skill you will develop over time. Just do not take anything out of the hood when working with open tubes and do not lean in over them. Put tools back in alcohol if you need your hands free.
With the node directly in line with the forceps, lift the node and place directly down the center of the tube. Replace forceps in alcohol and screw lid onto tube about ¼ turn back from all the way. There will be a little room in the threads for the plant to exchange air at the same time reducing the hazard of contamination.
Continue until each tube contains one cutting, cleaning the plate and tools with alcohol between cuttings. Wrapping the neck of the tubes is optional, where the lid meets the tube, with the plastic wrap as an extra layer of protection. It may be necessary to spool out some of the wrap before using it on the jar if it is sticky.
Grow the cultures under a small fluorescent fixture like a T5 or compact fluorescent in a clean area at about 10 watts per square foot. Evaluate the tubes for molds that may have gotten into the gel or any fuzziness or odd coloration. Remove spoiled tubes and clean elsewhere. Plants should take a few weeks to grow the two or three nodes you will want to transfer into new vessels. Do not wait too late to order the full Microclone Kit you will need to produce the new jars. The Microclone Kit contains vessels and ingredients for months of culture and hundreds of clones.
Cuttings sill grow to two or three times their size, mostly by thickness, in about four weeks at 70 degrees and 50% humidity. If your purpose is simply to elimination of disease, then the cultures which have grown without any sign of contamination may be removed from the tubes, rinsed, and planted in a high humidity environment. Some growers will use the kit to restore original genetic behavior. These plants should be transferred into gel culture for another growth cycle or two before removing and planting. Liquid introduction techniques have been used by the major strain gatherers in the field to collect clone material for breeding and production.
For more materials and to purchase kits, please visit planttc com or email microclone100 at gmail. See videos on YouTube under Microclone. Like our Facebook page-Microclone Plant Tissue Culture
Pure Food Gardening


